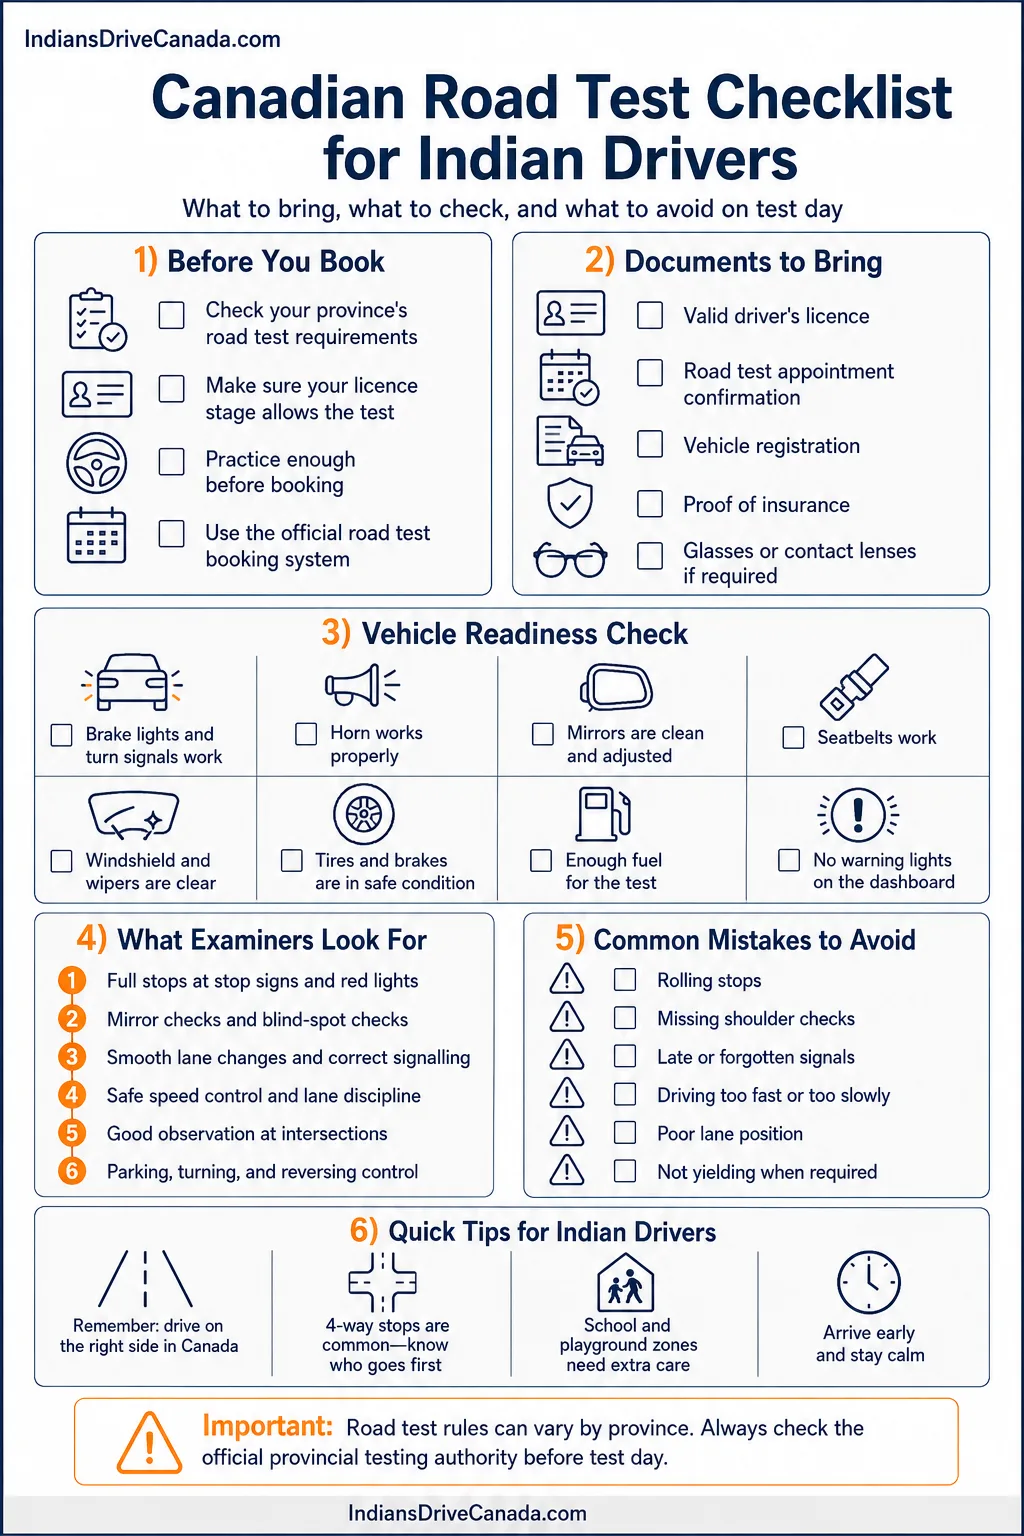
Indian driving experience can make vehicle control feel familiar, but a Canadian road test measures whether that experience is applied according to the rules, observation habits and traffic direction used in the province where the test is taken.
Before practising parking or lane changes, confirm the exact licence class shown on the booking. Canada does not have one national passenger-vehicle road test. The documents, vehicle rules, tested manoeuvres, waiting periods and highway-driving requirements are set by each province or territory.
Confirm the Licence Stage Shown on the Booking
The phrase “Canadian road test” can refer to different tests. Ontario separates the G2 and G road tests. B.C. still uses the Class 7 road test to obtain N status, but since October 19, 2026, eligible GLP drivers no longer take a second road test to progress from Class 7 to Class 5; ICBC uses a Driving Record Assessment instead.[B.C. GLP rule] A Class 5 road test still applies when a B.C. licensing route independently requires one, including some applicants moving from non-exchange jurisdictions. The B.C.-specific licensing route for Indian licence holders is covered in the Indian driving licence in British Columbia guide. Other provinces use their own Class 5 stages and terminology.
Check all four items before making a practice plan:
- The province or territory administering the test
- The exact licence class or stage printed on the booking
- The licence or learner document that must be valid on the test date
- Whether the test may include a freeway, highway or higher-speed road
| Province | Test terminology | Check before practising |
|---|---|---|
| Ontario | G2 or G road test | Whether the booking is for basic G2 skills or the full G test with a highway-driving component |
| British Columbia | Class 7 road test; Driving Record Assessment for eligible GLP progression; Class 5 road test where the licensing route still requires one | Whether the appointment is for the Class 7 N test, another Class 5 road-test route or a Driving Record Assessment |
| Alberta | Class 5 road test | The eligibility, document and vehicle requirements provided by the registry agent |
| Manitoba | Class 5 road test | Whether the candidate holds a valid 5L or 5A licence and meets the applicable stage requirements |
| Saskatchewan | Class 5 road test | Whether the required driver education record is already on the SGI file |
| Quebec | Class 5 road test | The test path assigned by the SAAQ to the newcomer or learner |
Ontario Applicants Must Use the Post-July 2026 Experience Rules
Effective July 1, 2026: Ontario limits verified foreign driving experience from countries without a licence exchange agreement to a maximum of 12 months. India is treated under the non-agreement route.
An Indian licence holder with at least 12 months of accepted experience may be eligible to take the G2 road test without completing the normal G1 waiting period. After passing G2, the driver must wait at least 12 months before attempting the G road test.
Several years of driving in India no longer provide a direct route to the G road test for applicants covered by the non-agreement rules. Preparation should therefore match the licence stage assigned by DriveTest rather than the number of years shown on an Indian licence or driving record.
A driving extract and an authentication document are not automatically the same thing. Ontario states that the authentication document must come from the foreign government or licensing agency, confirm that the licence is authentic, and be written in English or French. Confirm whether the document being presented meets that definition before relying on it for experience credit.
The applicable requirements can be checked through the Ontario foreign licence exchange requirements and the DriveTest foreign licence experience rules.
Build a Road Test Document Folder
The Indian driving licence is not a substitute for the provincial licence or learner document required for the scheduled test. Once a provincial licensing authority has placed an applicant into a specific testing stage, the test-day documents must match that stage.
Candidate documents
- Valid provincial learner, novice or testing licence required for the appointment
- Identification required by the provincial licensing authority
- Booking confirmation or appointment number
- Payment confirmation or test receipt when the province requires one
- Corrective lenses if the licence carries a glasses or contact-lens restriction
Vehicle documents
- Valid vehicle registration, permit or registration certificate
- Valid proof of insurance for the test vehicle
- Valid vehicle inspection document where the province requires one
- Rental, car-share or company authorization when required
Documents that depend on the applicant’s licensing route
- Original Indian driving licence if the licensing authority has instructed the applicant to bring it
- Authentication letter or driving-history document used for foreign experience credit
- Accepted English or French translation when the original document is in another language
- Driver education certificate if the training record is not already held electronically
- Previous test report when preparing for a retest
Check that names, dates of birth and document numbers are readable. A name difference caused by abbreviations, reordered names, marriage or transliteration may need to be resolved before the appointment rather than at the test vehicle.
Choose the Test Vehicle Before Finishing Practice
The best test vehicle is usually one the candidate has already driven enough to operate without searching for controls. Changing from a familiar car to a different vehicle shortly before the test can affect braking, steering, parking references and blind-spot checks.
Using a family or friend’s vehicle
Confirm that the vehicle is insured and that the policy permits the candidate to drive it. The registered owner should provide the registration and insurance documents. A road test appointment does not create insurance coverage that does not otherwise exist.
Using a driving-school vehicle
Confirm the booking with the school, the vehicle arrival time and whether the same car used during lessons will be supplied. Learn the location of the parking brake, hazard lights, defroster, headlights and window controls even if an instructor normally manages some of the preparation.
Using a rental or car-share vehicle
Do not assume a rental or car-share reservation permits road-test use. Check the company agreement and the licensing authority’s rules before booking the vehicle.
British Columbia requires an original authorization letter when a candidate uses a car-share vehicle but is not the named member. ICBC states that the letter must be on company letterhead, signed and dated, and a new letter is required for each test attempt.
Complete the Vehicle Check Before Test Day
An examiner may cancel or refuse a test when the vehicle is unsafe, cannot be inspected properly or does not meet legal requirements. A valid safety inspection sticker does not prevent the examiner from carrying out a separate test-day vehicle check.
| Area | What to check | Test-day risk |
|---|---|---|
| Brake lights | Both rear brake lights and the centre high-mounted brake light | A failed lamp can cause the vehicle to be refused |
| Signals and headlights | Front and rear signals, headlights, running lights and hazard lights | The examiner must be able to verify that required lights work |
| Windshield | Cracks, chips, stickers, tint and anything blocking the driver’s view | Damage or illegal tint may make the vehicle unacceptable |
| Wipers and visibility | Wipers, washer fluid, heater, defroster and mirrors | The test may not proceed if windows cannot be kept clear |
| Warning lights | Airbag, brake, ABS and other warnings that may affect safe operation | A safety-related dashboard warning can lead to cancellation |
| Tires | Pressure, visible damage, tread condition and temporary spare use | Unsafe tires can result in refusal |
| Doors and windows | Driver and front passenger doors open from inside; windows operate | The examiner must be able to enter and leave safely |
| Seats and belts | Front passenger seat, headrest and working seat belt | The examiner requires a safe seating position |
| Controls | Horn, speedometer, brakes and parking brake | Required operating equipment must work |
| Registration and insurance | Documents are valid and relate to the vehicle being used | Missing or mismatched documents can end the appointment |
| Interior | Clean passenger area with no loose objects, smoke or strong scent | Health or safety concerns may prevent the test |
| Fuel or battery | Enough fuel or electric charge for the full appointment | An insufficient level can make the vehicle unsuitable |
Check the lights with another person. The centre brake light is easy to miss when inspecting the car alone. Alberta and Manitoba both identify the third brake light as part of the test-vehicle check.
Province-specific vehicle details worth checking
Reset Left-Side Driving Reference Points
Experience gained in India remains useful, but some automatic positioning habits must be reversed. Canada drives on the right side of the road, the steering wheel is normally on the left side of the vehicle, and the centre line is on the driver’s side.
Use the correct turn shape
A right turn in Canada is normally the tighter turn. A left turn crosses opposing traffic and requires a wider path. Enter the correct lane unless signs, markings or the examiner’s direction require a different movement.
- Approach a right turn from the correct right-side position
- Check for pedestrians and cyclists before crossing a sidewalk or bicycle lane
- Avoid swinging into the next lane while completing a right turn
- Wait for a safe gap before crossing opposing traffic on a left turn
- Finish the left turn in the correct available lane
Rebuild lane-position references
Drivers changing from a right-hand-drive vehicle may initially place the car too close to the right curb or too close to the centre line. Practise on ordinary streets until lane position no longer requires constant correction.
Use road markings, mirror views and the space on both sides of the vehicle. Do not depend on a single point on the bonnet because the reference changes between vehicles.
Reverse the roundabout direction
Traffic in Canadian roundabouts circulates counterclockwise. Reduce speed, read the lane signs before entering, yield as required and watch for pedestrians at the exit. Do not enter using the clockwise movement familiar from left-side traffic.
The first turn after leaving the test centre deserves the same observation as any other turn. Entering the wrong side of a divided or undivided road can end the test immediately.
Make Observation Clear and Timely
A road test cannot credit an observation the examiner cannot reasonably see. A quick eye movement toward a mirror may not show that the blind spot was checked. Use normal head movement without turning the action into an exaggerated routine.
A practical observation sequence
- Check the rear-view mirror.
- Check the relevant side mirror.
- Signal early enough to communicate the intended movement.
- Check the blind spot with a shoulder check.
- Confirm the space remains safe.
- Move smoothly while continuing to observe traffic.
The exact order may change with the situation. Observation must happen before the vehicle changes direction, not after it has already crossed a lane marking.
Movements that usually need a shoulder check
- Leaving the curb or a roadside parking position
- Changing lanes
- Moving around a parked vehicle or obstruction
- Entering or crossing a bicycle lane before a turn
- Merging onto a highway
- Leaving a parallel parking space
- Re-entering traffic after a roadside stop
A shoulder check does not replace mirror use. Mirrors show approaching traffic, while the shoulder check covers the area hidden beside the vehicle.
Show a Complete Stop at the Correct Position
Slowing to walking speed is not a complete stop. The wheels must stop moving before the vehicle proceeds.
Where to stop
- Before the stop line when one is present
- Before the crosswalk when there is no stop line
- Before entering the intersection when neither is marked
If buildings, parked vehicles or vegetation block the view, stop at the required position first. Then move forward slowly to a place where traffic can be seen without blocking pedestrians or entering the path of another vehicle.
Right turn on red
A right turn on red is not an automatic movement. Stop fully, check signs, identify any local prohibition, yield to pedestrians and traffic, and turn only when the movement is legal and safe. Remaining stopped is required when a sign prohibits the turn or a safe gap is not available.
Four-way stops
Track the arrival order while approaching. If another road user arrived first, allow that vehicle to proceed. When arrival order is unclear, avoid competing for the intersection. Make eye contact where possible and proceed only when the right-of-way decision is settled.
Use Speed That Matches the Road
Driving well below the limit does not automatically appear safer. It can create hesitation, disrupt traffic and make a merge difficult. The examiner expects a speed that follows the posted limit while remaining suitable for weather, visibility, pedestrians, traffic and road surface conditions.
Recheck speed after each change in road environment
- After turning onto a new road
- When entering or leaving a school or playground zone
- When passing a construction or temporary speed sign
- When the road changes from residential to a larger arterial road
- When rain, snow, ice, fog or glare reduces visibility
- When approaching a curve or an area with parked vehicles
Accelerate with purpose after a stop when the road is clear. On a highway entrance, use the acceleration lane to approach the speed of traffic before merging when conditions allow. Stopping at the end of a clear acceleration lane can create a hazard unless traffic conditions require the stop.
Practise Manoeuvres as Complete Routines
Parking is not assessed only by the final position of the vehicle. Observation, signalling, control, right-of-way and the decision to begin the manoeuvre are also part of safe performance.
Parallel parking
- Identify a legal and suitable space
- Check mirrors and signal before positioning
- Observe traffic, pedestrians and cyclists before reversing
- Reverse slowly enough to make controlled corrections
- Avoid the curb, poles, vehicles and other objects
- Finish within the space and at an acceptable curb distance
- Check mirrors, signal and shoulder-check before leaving
Do not rely only on a reversing camera. It can assist with distance, but it does not show the entire area around the vehicle.
Roadside stop
- Choose a legal place rather than stopping beside a driveway, intersection or prohibited area
- Signal and shoulder-check before moving toward the curb
- Stop parallel to the curb without striking it
- Secure the vehicle as directed
- Observe, signal and shoulder-check before rejoining traffic
Reverse or stall parking
- Scan the full parking area before reversing
- Watch both sides of the vehicle rather than fixing attention on one mirror
- Yield to pedestrians and vehicles already moving through the aisle
- Finish within the marked space
- Stop and reset rather than continuing an unsafe correction
Turnabout or two-point turn
Use the method described in the applicable provincial handbook. Check in every direction before each change between forward and reverse movement. Do not use a driveway or road position that creates a conflict with pedestrians, parked vehicles or approaching traffic.
Hill parking
Know when to use the parking brake and how the front wheels should be positioned for uphill, downhill, curb and no-curb situations under the provincial handbook. Practise the sequence in the same vehicle that will be used for the test.
Prepare Separately for a Highway Test
Not every passenger-vehicle road test includes highway driving. Prepare for it when the booked test or provincial authority requires it.
Entering the highway
- Read the entrance signs and identify the merge area early
- Build speed smoothly in the acceleration lane
- Check mirrors, signal and shoulder-check
- Select a gap without forcing another driver to brake
- Merge without crossing a solid lane marking
Changing lanes
- Maintain a safe following distance
- Check the traffic speed in the destination lane
- Signal before moving
- Complete a shoulder check
- Move gradually rather than steering sharply
- Cancel the signal after the lane change
Exiting
- Read exit signs early enough to choose the correct lane
- Avoid crossing several lanes at the last moment
- Enter the exit lane before reducing speed when the road design permits
- Adjust speed for the ramp curve and posted advisory sign
Ontario requires a Class G road-test candidate to declare enough recent experience on roads with a speed limit of at least 80 km/h. Confirm the declaration requirements on the DriveTest car road test page before the appointment.
Recognize Examiner Instructions Before the Test
Road tests are normally conducted using the official language or languages offered by the province. A translator may help before or after the test in some provinces, but that person is generally not permitted to ride in the vehicle.
Become familiar with instructions such as:
Ask the examiner to repeat a direction if it was not heard or understood. Do not make a sudden turn, cross several lanes or break a traffic rule to follow a late instruction. Continue safely until another direction can be given.
Practise directions in the vehicle rather than only reading them. A supervising driver can give short instructions while the candidate decides when and how to perform the movement safely.
Province-Specific Test-Day Checks
| Province | Test-day requirement or risk |
|---|---|
| Ontario | Bring the correct Class G vehicle. For a G test, complete the required highway-experience declaration. The examiner performs a basic vehicle check. |
| British Columbia | Bring one primary and one secondary identification document, payment, and a safe insured vehicle with a Canadian plate. Turn off GPS and navigation systems. Recording devices are not allowed. |
| Alberta | Use the registry agent’s road test information sheet to confirm eligibility, documents and vehicle requirements. Alberta no longer requires an advanced road test to exit the Class 5 GDL program. |
| Manitoba | Bring a valid 5L or 5A licence and the vehicle registration certificate. A supervising driver must attend check-in but cannot ride during the test. The retest waiting period after an unsuccessful attempt is 14 days. |
| Saskatchewan | Bring the appropriate licence and the required driver education certificate if the training record is not on the SGI file. Pets and passengers are not allowed. An unsuccessful Class 5 candidate normally waits two weeks before another test. |
| Quebec | Follow the test route assigned by the SAAQ for the applicant’s status. An unsuccessful passenger-vehicle road test carries a waiting period of at least 28 days before another attempt. |
| Nova Scotia | Bring a valid driver’s licence or valid out-of-country licence, proof of liability insurance, a valid vehicle permit and proof of a valid motor vehicle inspection. |
| New Brunswick | Confirm the licence stage and bring a roadworthy vehicle with valid registration and insurance. New residents from non-reciprocal countries may be required to complete the vision, written and road tests. |
| Prince Edward Island | The vehicle must meet safety requirements and carry valid registration, inspection and insurance. A pre-trip safety inspection is conducted before the road test. |
Waiting periods and retest conditions are not interchangeable between provinces. A candidate who moves after starting a licensing process should contact the new province before booking another test.
Adjust the Checklist for the Weather
A test may continue in rain, cold or light snow unless the licensing authority cancels it. The candidate is still expected to use the vehicle controls correctly and choose a speed suitable for the conditions.
Snow and ice
- Remove snow and ice from every window, mirror, light and licence plate
- Clear loose snow from the roof, bonnet and trunk
- Test the heater, defroster, wipers and washer fluid
- Use smooth steering, acceleration and braking
- Increase following distance
- Reduce speed when traction or visibility is limited
Rain
- Know how to change the wiper speed without looking away from the road
- Use the lights required by the provincial rules and conditions
- Allow more braking distance
- Watch for pedestrians near puddles and curbside water
- Keep windows clear of condensation
Low sun and glare
- Clean the inside and outside of the windshield
- Position the sun visor before entering strong glare
- Reduce speed when pedestrians, signals or lane markings are difficult to see
- Avoid using sunglasses that interfere with a corrective-lens restriction or safe visibility
Road Test Day Checklist
The evening before
- Confirm the test centre, date, arrival time and licence class
- Place candidate and vehicle documents in one folder
- Check every exterior light with another person
- Inspect the windshield, tires, mirrors and licence plates
- Fill the washer-fluid reservoir
- Check fuel or electric charge
- Remove loose items from the passenger compartment
- Confirm the vehicle with the owner, driving school or rental provider
- Review the route to the centre without trying to memorize a test route
Before leaving home
- Check the appointment status and local weather
- Start the vehicle and review warning lights
- Clean snow, ice, condensation or dirt from all viewing areas
- Bring required glasses or contact lenses
- Allow time for traffic, parking and check-in
At the test centre
- Park in the location instructed by the centre
- Complete check-in by the required time
- Keep the vehicle plate number available
- Turn off the phone, GPS and navigation system where required
- Adjust the seat, steering wheel and mirrors
- Fasten the seat belt before moving
- Know the location of the horn, lights, signals, parking brake and defroster
- Ask about any instruction that is unclear before the vehicle starts moving
During the test
- Follow traffic signs even when the examiner has not mentioned them
- Continue observing while listening to directions
- Do not ask whether a mistake has caused a failure
- Do not abandon safe driving after a parking correction or missed turn
- Repeat the observation routine before every lane or curb movement
- Use cameras and sensors only as supporting equipment
- Choose a safe action when an instruction cannot be followed legally
After an unsuccessful attempt
- Read the examiner’s report before booking another test
- Separate repeated observation errors from one isolated parking error
- Confirm the provincial waiting period
- Check whether professional instruction is required after multiple attempts
- Practise the weak skill on several roads rather than only near the test centre
- Repeat the vehicle inspection before the new appointment
Check the Appointment Against the Provincial Rules
Requirements reviewed on July 27, 2026. Test procedures can change, and appointment confirmations may contain instructions not repeated on general information pages.